¶ Introduction
Let's have a look at how objects are moved, rotated, duplicated, deleted, or glued in the editor.
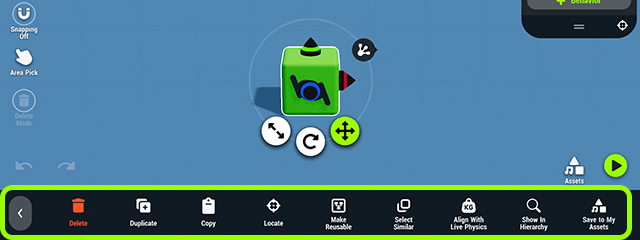
To do these edits, first select an object by tapping it. This will make the Gizmo appear on the object, and will also open the context menu on the bottom toolbar. This context menu contains several options that you can explore here.

¶ Transforming Objects
Transforming an object means editing its position, rotation or size. There are two ways to transform your object:
- You can use the Gizmo, or;
- You can change the values in the Transform section of the Details panel.
¶ Using the Gizmo
The Gizmo is the widget that appears when you select an object. It looks like three handles pointing in different directions, along with some buttons.
To use the Gizmo, tap and hold one of the handles and drag in any direction. This will transform the object, depending on what you have selected.
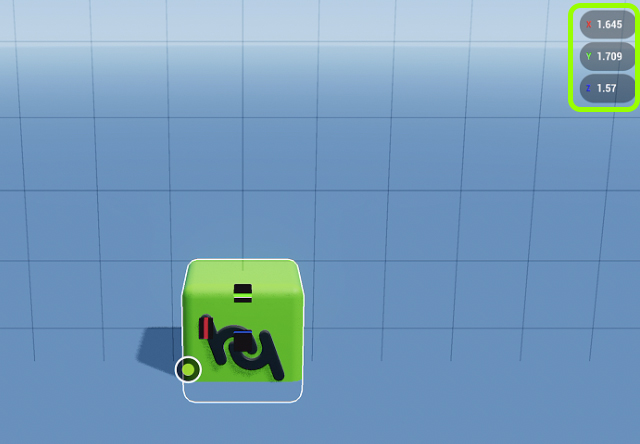
When transforming an object, it's current values will appear on the top right corner.

¶ Moving Objects
To move an object, make sure the movement button is selected. You can then either drag the handles, or drag directly from the button. The latter will let you move it in the plane that is selected.
¶ Rotating Objects
To rotate an object, make sure the rotation button is selected. You can then either drag the handles, or drag directly from the button. Dragging sideways will rotate in the Y axis, while dragging up and down will let you rotate freely.
¶ Scaling Objects
To scale an object, make sure the scaling button is selected. You can then either drag the handles, or drag directly from the button. Dragging from the button will make the object grow or shrink the same amount in all directions.
¶ Using the Details Panel
The Details panel will appear once you have selected the object. Expand the Transform section to see the object's current values. The values are color coded, with pink for X, green for Y, and blue for Z.
If you are unhappy with how the object was transformed, you can tap the undo arrow on the Transform section and revert to the original position/rotation/scale.
¶ Moving Objects
Values can be input manually by tapping the number you want to edit, and then using the pop-up keyboard.
You can also drag either left or right from the number to select an estimate.
¶ Rotating Objects
Values can be input manually by tapping the number you want to edit, and then using the pop-up keyboard.
You can also drag either left or right from the number to select an estimate.
transformobj_details_rotate.mp4
¶ Scaling Objects
Values can be input manually by tapping the number you want to edit, and then using the pop-up keyboard.
You can also drag either left or right from the number to select an estimate.
THere is an extra button here, which allows you to link/unlink the values you are scaling. If the button is activated, editing one value will change the other two. If the button is deactivated, editing one value will only change the object on that axis.
transformobj_details_scale.mp4
¶ Duplicating Objects
To duplicate an object, make sure that the correct object is selected, and then tap on duplicate on the bottom toolbar. This will create a new object next to the one you had selected.
¶ Deleting Objects
To delete an object, make sure the correct object is selected, and then tap on delete on the bottom toolbar. This will remove the object from your scene.
¶ Gluing Objects
To glue two objects together, select one of the objects and drag a link from the glue icon to the other object. Now you can move both objects at the same time.
To unglue two objects, you can select either of them and tap on the glue icon. If you select the child object (the one glued to the other), select detach from parent. If you select the parent object (the one glued into), tap on detach all children.
If you are gluing an object to a model with a skeleton, make sure you select the correct bone. For example, when gluing a hat, select head. This will ensure that when the player moves, the object will move accordingly.
¶ Grouping Objects
To group objects together, select all the object that you want to group, and tap on Group in the bottom toolbar. This will keep your objects together, but only in the editor. If you want to keep objects together in gameplay, please see Gluing Objects above.
modifying_objects_grouping.mp4
¶ Related Topics
Working with Assets