¶ Overview
Congratulations! You have created a game and it's doing well. Once reaching engagement level 10 your game will be eligible to include HypeX transactions.
Adding in-app purchases is a pretty straight forward process but you'll want to implement them carefully to ensure your players get what they pay for.
¶ Purchase Node Live Demo
In this video @shogun shows how to implement a simple in-app purchase set up into a game.
It is important to ensure that your instructions are clear and easy to use so players feel confident and secure when making any transactions.
¶ The Purchase Node
The Purchase Node can be found in the Meta logic category only after the game being edited has reached engagement level 10.
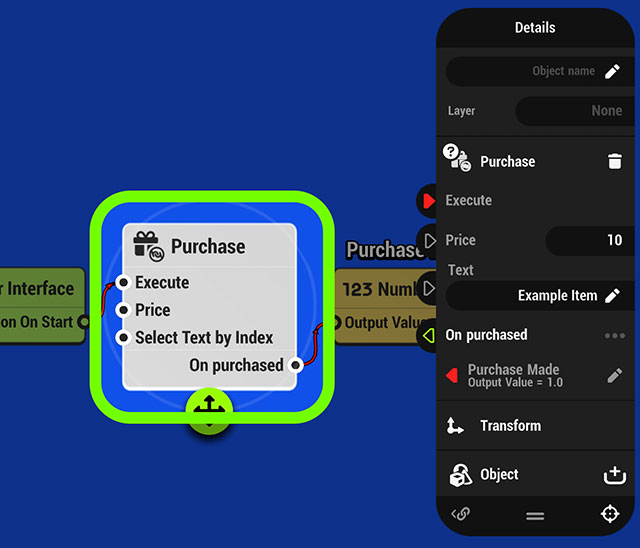
The Node only has 4 parameters but's all 4 will be needed to create an in-app purchase.
¶ Parameters
| Parameter | Description |
|---|---|
| Execute | Executes the node and opens confirm popup for the player |
| Price | HypeX price for the item |
| Text | Text name for the in-game purhcase item |
| On purchased | Will be executed when player successfully puchases the item. |
¶ Implementing In-App Purchases
There are many different types of purchases that can be built into your games. For the purposes of this example we will focus mainly on the purchase process, additional logic will be required to create the systems needed to support whatever it is you are selling to players.
¶ Executing the Purchase Node
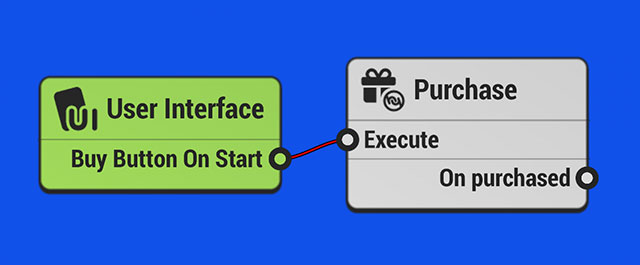
Like most Nodes the Purchase Node needs to be executed to perform it's function. In most cases this will likely come from a button output in the UI node but any Node output can execute it. The source of the executing link should always make it clear to the player that tapping it begins the purchase flow.
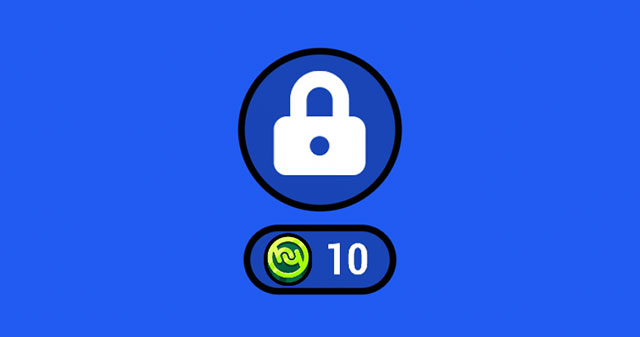
Displaying the HypeX icon and the cost of the item is a good best practice for buttons that initiate a purchase
Note that executing the Purchase Node does not immediately execute the player's purchase. There is an additional pop-up that will allow the player to confirm the HypeX price and what they are getting for it.
Steps:
- Add a UI Node and create a button with it (See the UI Node entry for more on working with that Node)
- Drag a link from the button's “On Start” output to execute the Purchase Node
¶ Setting a Price
To set the HypeX price simply edit the value in the Purchase Node.
Note that this value can also be pulled from another Node allowing you to have dynamic pricing of items. For example, perhaps you implement a purchase where the player can choose how much they want to pay for the item.
¶ Set the Text
The Text will appear in the confirmation pop-up as the name of the thing being purchased.
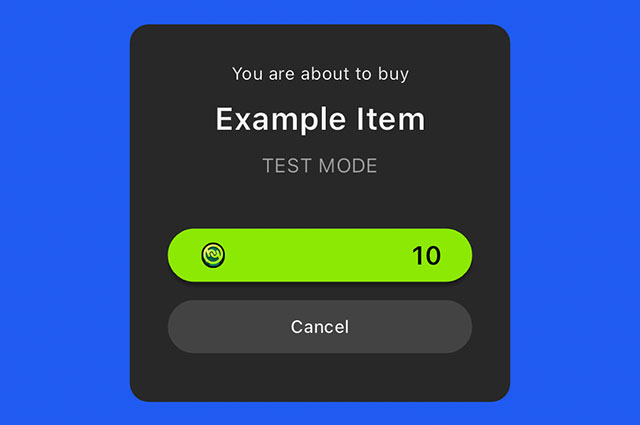
when testing your purchase logic in the editor “TEST MODE” appears in the pop-up
¶ On Purchase Output
The On Purchase Output will be executed once the player has confirmed the purchase in the pop-up.
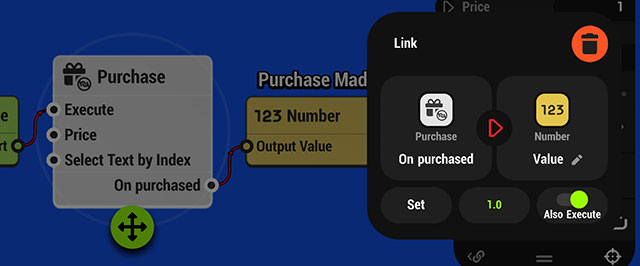
There are many potential links to make here depending on what the player is purchasing. For this example we will output a value of 1 to a Number Node that is tracking if the purchase has been made.
Steps:
- Add a Number Node from the Logic Library and name it (we'll name ours “purchase made”)
- Drag a link from On Purchase to the value input of the Number Node
- Set the value to 1 using keyboard value
¶ Player Save Settings
If what the player is purchasing is intended to be permanent, such as a player skin, it is crucial that a record of the purchase is saved so that the player retains the skin every time they return to your game.
Steps:
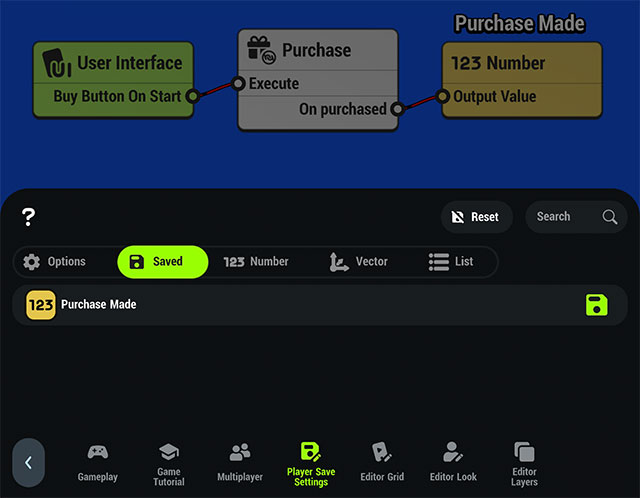
- Navigate to Settings > Player Save Settings in the Toolbar
- Tap the Number Tab and find the named Number Node you added to track the purchase
- Tap the disk icon on the right to save this value
- The Node will now also appear under the Saved tab
- Tap the Options tab and set to your wishes
- Disabling Resettable will ensure players can't accidentally remove their purchases but they also can't reset their progress if they desire
- Save automatically will automatically save anytime a value is updated in a saved node, save using Node requires the Player Save Node to be executed to save the values
Check Player Save Settings for more info on working with these menus.